Tuesday, December 22, 2015

Miscellany

Mid-winter a few years ago, a co-worker asked, "What do you do for fun, once the riding season is over?" Having just acquired the XS750 project, I replied, "There are two seasons in Alaska: riding and wrenching." I don't like to waste my riding season working on the bikes, since the riding season is short enough as is, and invariably, once I start working on a bike, I'll end up with it off-line while I'm waiting for parts to arrive. On the other hand, I do enjoy tinkering on the bikes, so taking them apart to perform all the maintenance and upgrades during the off-season -- when I can't ride, anyway -- is a good way to spend the cold, dark winter months. To that end, I have thrown myself into work on all three of my bikes over the last two months.


In August, I rode my ultra-reliable V-Strom to work one morning, and noticed that it was acting funny while I was idling at a stop light. The turn signals were kind of flickering rather than blinking, and the engine seemed to be running rough, which is very unusual for that bike. I revved the engine a bit, and it settled down, leading me to think that I had a dead battery. That wasn't particularly surprising, considering that it's still the original battery -- six seasons old, now. After work, sure enough, there wasn't enough juice to start the engine. Fortunately, a co-worker was able to jump start me, and I made it home...but just barely. I needed the bike running ASAP, since our motorcycle organization had an event that weekend (this was a Thursday), so rather than taking the time to perform full diagnostics, I jumped to the most likely cause -- a dead battery -- and bought a replacement the next day. After work, I plugged in the new battery, started the engine, and connected a multi-meter to the battery terminals, reading 12.3VDC...not good. I should have been reading just over 14VDC. I took the Yamaha on the BACA event, then ended up ordering both a replacement voltage regulator and stator...at which point, I found that I also needed a gasket for the stator cover, since the V-Strom drips oil onto the stator to keep it cool. I believe I already mentioned something about invariably waiting for parts, once starting a maintenance project?

...all the while, I'm riding the 5000-RPM-idle cafe racer to BACA events...

...an hour away from home, one-way...

...in the rain.


The cafe racer is a fun bike, but with clubman handlebars and NO fairing to protect from the weather, while wearing leathers only in the rain (no rain suit, because my orange nylon rain suit does not exactly scream, "I am a bad-*** biker, and can keep you safe from those who mean you harm") at maybe 40F...not so much.

I was really missing my fairing, my heated grips, and my heated jacket liner, lol (fine, I'm a wuss; what's your point?!?!)

Then, on yet another cold, rainy day on the cafe racer, I started having problems getting the bike into first gear. I could shift into neutral, second, third, etc., but I had a bear of a time getting the bike to downshift into first at intersections. In frustration, I parked the bike, and caged it with my wife to escort one of our BACA kids to court, then when I got the chance to check the Yamaha Triples web site, I discovered that the XS750's have a tendency to break the layshaft bolt, which then causes difficulty shifting into first gear.

Great...with maybe three weeks left in the riding season and BACA Anchorage getting busy working with kids, I had not just one, but *TWO* broken bikes. The whole point of having a second bike was to have an alternate in case a bike broke down!

With the Yamaha now out of service, I jumped into high-gear trying to get the electrical problems with the V-Strom sorted out, since fixing the charging system seemed like a more manageable task. Yeah...no. After finally getting it all put back together again, I took the Strom out for a 10:00 p.m. shake down ride. I was elated for the first eight miles, as the cheapie Amazon.com volt meter that I had plugged into the accessory electrical socket was showing a steady 14.4VDC while riding. Then all of a sudden, I noticed that my voltage was dropping: 13.7V...13.6V...13.5V...about a tenth of a volt per second, more or less. I quickly whipped a U-turn and raced back home...12.9V...12.8V...7.0V. Wait, what?!?! 14.0V...12.2V...13.1V...I started seeing wild voltage swings all over the place, and my LCD panel on the bike had gone completely blank. The engine was running rough again -- the ECU wasn't getting good voltage, so the fuel injection was getting squirrely -- and I just barely made it home (the bike died in the driveway). I opened up the bike -- AGAIN -- and determined that the brand new regulator/rectifier had failed. I parked the Strom, because quite frankly, I was completely fed up with it. I had sunk $450 in parts on the V-Strom in the last two months, and it STILL didn't work right. I spent the rest of the season riding my wife's CB750A to BACA events, and caging it to and from work, sigh.

Fortunately, this was the point that I found the GL1000 project, and I had so much fun working on this bike, that I eventually built up enough motivation to dig into the V-Strom again. Electro-Sport made good on their warranty of the regulator/rectifier, which I re-installed last night, and which now seems to be working properly.


Then, I managed to obtain spousal approval on a pair of Dime City Cycles mufflers for the Yamaha, which are now sitting in the garage, waiting for me to fabricate new balance tubes and connecting pipes to the existing headers. After that, I'll need to drain the oil and dig into the transmission case to replace the layshaft bolt. Oh, yeah...and I've got an envelope full of carburetor parts -- butterfly shaft screws, butterfly shaft seals, circlips, and springs -- for the XS750. Hopefully, those will resolve the high-idle problem on the cafe racer; if not...new carbs?

As for the GL1000...it needs a new voltage regulator, too. Unlike the V-Strom, the 'Wing uses a separate voltage regulator and rectifier, but most of the after-market units I have found seem to be integrated. Oregon Motorcycle Parts makes a reasonably priced unit that seems like it would fit the bill quite nicely, and in my initial conversations with them, they seem to be pretty good people to work with. I expect to have their VRRPM3H-GL1000 model on order in the fairly near future. After that, lower handlebars (so I can connect the front brake line), and a new battery...and the GL1000 should be running! I still want to replace the rear shocks with Hagon 2810 TTSA's, like I did on the Yamaha, and I'd like to order new side covers and shelter covers from E-Bay, because I'd like to go satin black on the 'Wing, but I don't want to ruin the original plastic, since it's in reasonably good shape. However, that's all wish-list material, not necessary-to-get-the-bike-running items ;)

Thursday, December 17, 2015

GL1000 Project, Part 4: Fork Springs


Given the intended mission of the "new" GL1000, one of the higher priority items on my to-do list is upgrade the suspension. This was also a high-priority on the XS750 project, so taking a cue from the work I did last spring on the Yammie, I bought a set of Progressive Suspension fork springs for the Goldwing. Although time consuming -- it took about 6 1/2 hours, most of which was spent trying to remove the old dust seals and oil seals -- the work was relatively straight-forward. Here's how I did it:

  1. Place a jack under the engine of the bike -- but don't lift it yet! -- then loosen up the axle pinch bolts at the bottom of the forks, remove the front fender, and remove the brake calipers.

  2. Just barely loosen the bolts that hold the forks in the triple tree.

  3. Raise the front wheel off the ground with the jack, then remove the front wheel.

  4. Now, loosen the bolts that hold one fork leg in the triple tree, and slide the fork almost -- but not completely -- out of the triple tree. Now tighten the bolt in the lower triple clamp to hold the fork in place while you...

  5. ...use an allen wrench to remove the cap on the top of the fork leg. Be careful, because the cap will be under tension from the fork spring! If you're not careful, the cap will fly off of the fork ;)

  6. Loosen up the bolt in the lower triple clamp, and remove the fork from the triple tree.

  7. At the bottom of the fork, near the bolt that holds the fender brace in place, is the oil drain bolt. Remove it, and drain the fork oil. Once the flow of oil has almost stopped, pump the forks a few times to remove the remainder of the oil.

  8. Remove the fork spring.

  9. Now, turn the fork upside down, and use an allen wrench to loosen the bolt that holds the damper rod inside the fork tube.

  10. Remove the damper, and let any remaining oil drip onto a rag or into the drain pan.


  11. Remove the dust seal -- easier said than done, in my case -- and then use a small, flat-blade screwdriver to remove the spring clip that holds the oil seal in place.

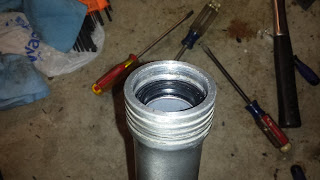
  12. Sacrifice a small goat and maybe a chicken, say the proper prayers to the appropriate kindly spirits, and if you are very, very, VERY lucky, you will be able to remove the dust seal and the (shown) oil seal. I actually had to use a heat gun to warm up the fork leg and soften the 37-year-old rubber, then use a lot of elbow grease -- and a fair amount of patience -- to remove the oil seal. Randakk's has a blog entry on building a tool to assist with the job; I just used a (large) screwdriver.

  13. Depending upon the age and condition of your forks, you might need to spend a little quality time cleaning up the insides of the fork. In my case, the forks were pretty nasty, so I used some denatured alcohol, then some brake cleaner to get all of the grunge and old fork oil out.

  14. Once everything is clean, install the new oil seal, retaining clip, and dust seal, then slip the damper back inside the fork tube, and slide the fork tube back inside the fork lower.

  15. Tighten the allen screw on the bottom of the fork to lock the damper in place.

  16. Collapse the fork, and fill the lower with fork oil. The Honda manual says to use a little over 6 oz. of ATF(!) transmission fluid in the fork (actually, I think it was a little over 7 oz., when completely rebuilding the forks, as I did). The Progressive Suspension guide says to use no more than 140mm (from the top of the collapsed fork) of whatever oil the manufacturer recommends. I was leery of using ATF (why use transmission fluid, when there are oils that are DESIGNED for suspension damping?!?!), and the research I did on-line suggested that modern ATF fluid is not necessarily the same as what was available in 1978, so I used 10W Honda fork oil. I set my fork oil measuring tool to 180mm from the top of the fork, since a larger setting means less oil, and filled the first fork. When doing the second fork, I found that I did not have quite enough oil to fill it to the same level, meaning I must have added a little over 8 oz. of fluid. Hrmmmmm... I debated resetting the measuring tool to a lower level, so that I had a little more oil for the second fork, but in the end, I just bought another bottle of 10W fork oil. I doubt I added more than a half oz. of fluid to the second fork! <shrug> I'll see how the suspension feels, once the bike is running. If the front suspension damping feels too harsh, I'll drain some fork oil and see if that helps.

  17. Slip the new fork spring into the fork.

  18. Replace the o-ring on the fork cap.

  19. Slide the fork into the LOWER triple clamp, and tighten the bolt to hold the fork securely. This allows you to use both hands to screw the fork cap in place, and also allows you to tighten the cap (most manuals suggest putting the fork tube in a padded vise, but...why?). Once the cap is tight, loosen the bolt in the lower triple clamp, and slide the fork all the way into the top triple clamp, then tighten the bolts in both the upper and lower triple clamp to hold the fork securely.

  20. Repeat these steps for the second fork, then reinstall the wheel and the fender and you're done!


I had several other tasks that couldn't be completed until I had replaced the fork springs, so once I was done, I reinstalled the brake calipers, removed the OEM headlight ears,
installed a set of Dime City Cycles fork ears,
installed the new headlight bucket and the new turn signals, then sorted out the rats' nest that is the headlight and turn signal wiring.

Once the electrics were sorted, I temporarily put my old V-Strom battery back in the bike, and tested the turn signals...which lit up, but wouldn't flash. A new, electronic flasher module is now en route from Superbright LEDs.

Also, before tackling the fork springs, I changed the radiator fluid and final drive oil, neither of which is sufficiently complicated to warrant a blog entry. However, while running the engine during the coolant change, I discovered that the volt meter was indicating 16.7V at 2000 RPM(!). Not knowing if this was actually a charging system problem or a faulty volt meter, I connected my multimeter to the battery terminals, and found that the volt meter was, in fact, indicating correctly. I quickly shut the engine off, since I didn't want to damage the already undersized V-Strom battery, and found the "charging system troubleshooting guide" in my Clymer manual. I was happy to find that both the stator and rectifier were working properly, but apparently, the voltage regulator was toast. I've pretty much decided to replace the rectifier and regulator with a combined unit from Oregon Motorcycle Parts, but I'll probably wait until after Christmas to order it. I'll also need a new battery, since the faulty charging system is most likely what killed the old one (it wouldn't take a charge from my Craftsman battery charger), so...$50 Wal-Mart battery or $300 Shorai? We'll see how finances look this spring, I guess ;)

Thursday, November 26, 2015

GL1000 Project, Part 3: It Runs!

Just a quick post tonight (errr...this morning!). After getting the timing belts changed yesterday, I decided to change the oil and filter for a quick and easy task to mark off the checklist. About one hour elapsed time later (about two and a half hours later, including running my daughter to a friend's house), the 'Wing had a clean, new filter and fresh oil.

The bike wasn't running when I bought it, so having the belts and oil changed, I decided to see if I could get the bike to start. Since the battery was toast -- not just discharged, but ruined -- I had to borrow a battery from another bike, but with the help of a little starting fluid in the air box and full choke, it fired right up!

The radiator overflow reservoir was dry, so I had no idea how much coolant was in the radiator. Not wanting to damage the engine due to overheating, I didn't run the engine for long, but at least I know it's not just a sculpture for my garage. There may be -- no, ARE -- plenty of things that still need work, but at least I know the engine runs (w00t!).

Next up: coolant flush and refill, and final drive oil change.

Wednesday, November 25, 2015

GL1000 Project, Part 2: Timing Belts

Conventional wisdom on the 1st generation Goldwings is that Honda massively overbuilt the engine, using engineering parameters for an air-cooled, inline 4 on this liquid-cooled boxer. As a result, these bikes have a reputation for lasting well into six-figure odometer readings.

However, like Achilles, they do have one weakness: the engine uses an interference design on the pistons and valves, so if your timing belt breaks, it's an engine rebuild. That's why my first GL1000 project had the engine in several Rubbermaid tubs when I acquired it -- the timing belt had broken, and the p.o. overestimated his ability to repair the damage. I don't want to tear down the engine on this bike, so I decided to replace the timing belts before I ever even start the engine!

The procedure is pretty straight-forward:
  1. Loosen the radiator, and pull it as far forward as you can, to provide access to the four bolts that hold the timing belt cover in place;
  2. Remove the four bolts that hold the two timing belt covers in place;
  3. Remove the left-hand and right-hand timing belt covers (I had to use a rubber mallet to break the covers loose);
  4. Use a 17mm wrench to rotate the crankshaft (the two, stacked gears in the center of the engine) until the alignment marks on the left-hand and right-hand crankshaft pulleys line up EXACTLY with the markings on the engine case:
  5. Verify that the engine crankshaft is at TDC:
  6. Loosen the timing belt tensioner wheels, and remove the tensioner springs;
  7. Remove the belts;
  8. Install the new belts, making sure that you do not rotate the crankshaft or either cam gear (yeah, right...);
  9. Reattach the spring to the tensioner, then tighten the tensioner bolts as required;
  10. Verify the timing marks on the cam gears and crankshaft. If they aren't right, loosen the tensioner(s), remove the belt(s), and try it again. It took me three tries (per side!) to get everything lined up properly ;)
  11. Turn the engine through AT LEAST two full revolutions by hand (17mm wrench on the crankshaft gears again) to make sure everything is working properly;
  12. Reinstall the timing belt covers;
  13. Secure the radiator.


This, of course, is a highly simplified, ideal case. When I dug into my bike, I found that the radiator was almost immovable, that I had to remove the engine guards in order to remove the timing belt covers, that I had to remove the horns (there are two on my bike; not sure if that's typical) to remove the engine guards, and that I needed (okay, "wanted") to clean up the timing belt covers because they were kinda nasty ;)

Also, I didn't bother to check the crankshaft position after lining up the camshaft gears when removing the belts, which means that I don't know if the previous owner botched the belt alignment, or if the crankshaft and camshaft gears rotated a bit when I removed the belts. This is why it is IMPERATIVE that you check and recheck the alignment before buttoning everything up. If your cam timing isn't set properly, at best the engine won't perform as well as it should, and at worst, you could break pistons and valves. Here is how my timing looked when I double-checked alignments:


Cams are aligned, but the crankshaft...not so much.


And here is how the cams looked with the crankshaft at TDC. I had to pull the belts and rotate both camshaft gears until they were aligned properly. It would have saved a lot of time had I checked the crankshaft position before initially installing the belts. <shrug> I'll know better next time.

Edit: I hadn't reinstalled the timing belt covers yet when I wrote the post above. After finishing with the timing belts, I grabbed one of the covers, and decided it needed a good cleaning before I put it back on the bike:


After about three hours of quality time with a Scotchbrite pad, some Meguire's Metal Polish, and several paper towels (and maybe a little swearing), I was rewarded with this:


Not perfect (not really even close, to be honest), but a lot better than they were. I intend to ride this bike, not enter it in shows, so I'm not going to obsess on polishing a steel cover that is placed squarely in the middle of the spray coming off the front wheel ;) In this case, "good enough" is exactly that.

Tuesday, November 24, 2015

GL1000 Project, Part 1: Brakes

In aviation circles, there's an oft-repeated, old saw: "Taking off is optional. Landing is mandatory." The meaning, of course, is that you can always change your mind about going flying, if weather, fatigue or mechanical issues suggest that you might want to stay on the ground. However, once you "slip those surly bonds," you have a finite amount of time until you must come back down to land again.

This sentiment can be paraphrased for motorcyclists, too: "Starting is optional. Stopping is not." Maybe I'm just a wuss, but if I'm going to have to stop, I'd prefer it be on my terms, in my timing, and under control. To achieve this goal, it is imperative that the bike's brakes work properly, which is why one of the three highest priorities on the Goldwing project was to refurbish the brakes (the other two items being to replace the timing belts and to install the new headlight bucket and turn signals).

When I bought the bike, the previous owner mentioned that he had been unable to get the front brakes working properly. Digging into the box of brake parts, I found that he had already disassembled the right-hand brake, so I started cleaning it up first...which is when I found this:


That black line at the 10-11 o'clock position is a crack inside the slave cylinder, which passes behind the oil seal. Squeezing on the brake handle will cause brake fluid to squirt out of the cylinder, making the front brakes ineffective. Fortunately, I found a replacement caliper on E-Bay for about $30 shipped. Hopefully, it will be rebuildable. After coming to a stop on the RH caliper, I decided to go ahead and dig into the LH caliper. Approximately 30 minutes later, I was rewarded with a nice, clean, rebuilt (and hopefully working!) brake caliper:


One unexpected bonus is that the previous owner told me that he had already bought new brake lines for the bike. Since, after 37 years, I expected that the OEM lines would be suspect, at best, I had already planned to replace the brake lines with new, braided stainless steel brake lines. Unfortunately, the previous owner said the lines he had bought were plain rubber lines, like the ones Honda had originally shipped with the bike. O.K., I can live with that until I'm ready to install the after-market handlebars. However, when I opened the box of brake parts, I didn't find OEM brake lines, but rather the exact same brake lines I had intended to buy for the bike -- about $50 worth of parts that I would no longer need to acquire! I'll need to buy the ends for the brake lines, but I'm still ahead of where I expected to be when I bought the bike. In the mean time, I found that the unused Galfer lines from the XS750 project are almost a perfect fit for the lower brake lines, between the tee and the calipers, so I've installed them for now.

Wednesday, November 11, 2015

Liter Bike!!!

As I've mentioned before, my very first motorcycle was a 1978 Honda GL1000 -- one of the original Goldwings -- with the engine in pieces.
Against my better judgment, I sold that bike before I ever got it running, and I've kicked myself ever since. Then, in March of 2010, I bought my Suzuki V-Strom
which has been a great bike, and which I've truly enjoyed.

However, I've run into a bit of a conundrum recently. About two years ago, my wife and I joined a motorcycle group that "...seeks to empower abused children to no longer be afraid of the world in which they live." My XS750 cafe racer,
while a lot of fun, isn't really ideal for riding with this group: it still idles at 5,000 RPM once it's warmed up, the exhaust is rusting to pieces (more on that in another post, coming soon to a web browser near you!), the rear view mirrors and tail lights are all but useless (which makes it kind of hard to keep an eye on the riders behind me -- or for them to interpret my intentions --when riding in a group), and I removed all of the provisions for carrying passengers. Making things worse, while my wife is a capable rider with a bike of her own (a pristine 1977 Honda CB750A Hondamatic)
it also has a few characteristics that make it..."sub-optimal"...for riding in our group. Although it's a very cool piece of history, it's not a terribly fast bike (yeah, it's a CB750, but the Hondamatics had a significantly de-tuned version of that engine) among other things. Consequently, she often rides pillion on my Suzuki V-Strom when we are riding with the group.

While I can ride two up in the group on the Wee-Strom, it too is less than ideal for this purpose. First, surrounded by a big-bore Kawasaki Vulcan, a Honda VTX-1800, several Harley-Davidson's (go figure), and a bunch of H-D trikes, the Strom sticks out like a very tall, bright orange, sore thumb.
It just doesn't look the part. More importantly, as much fun as it as when ridden solo, the Strom is a bit under-powered and under-sprung for riding two-up, especially when riding in a group of torquey, large-displacement cruisers. Finally, the brakes are a bit soft for carrying two full-grown, American adults at highway (ahem...) speeds. To solve this problem, my wife and I considered buying her a Sportster 1200 with a Frankenstein trike conversion kit but although it was a hoot to ride and would certainly have looked the part in the motorcycle group...well, it just wasn't a good fit.

We talked it over, and decided that maybe I should sell the V-Strom and buy a more capable two-up bike. After reviewing the options, I had narrowed the list of potential mounts down to a 2016 Suzuki Bandit 1250, a 2015 Triumph Speed Triple,
and a brand new, unsold 2013 Honda CB1100.
Once again, none of these bikes were quite right. The Bandit was the most practical choice, but would need suspension upgrades since they are reportedly undersprung, just like my V-Strom. The Speed Triple was the bike that set my pulse racing, but the passenger seat was a joke, the bars were really low for riding any length of time (although not as bad as my XS750), and I was worried about insurance costs on a hooligan bike like that. The CB1100 would probably be the most comfortable, but I didn't like the red paint, it had no windscreen, and while checking it out at the local Honda dealer, I was already making a list of modifications to make it more of what I wanted (read that, "$$$"). It would have worked, but it just didn't make sense to drop roughly ten grand on a brand new bike, then chop it up to re-make it the way I wanted.

No, none of these bikes were ideal, even if they were a step up from my V-Strom.

Then, the other night, my wife was looking at the bikes for sale on Craigslist when she found a 1978 GL1000 project. Hmmm...I like GL1000's...
Better yet, even after upgrades, the price is low enough that I wouldn't have to sell the V-Strom, and I've seen a couple of seriously cool GL1000 custom bike builds. I set out making a list of upgrades, changes, and simple maintenance items to make a vintage Goldwing suitable for our needs, and came up with the following preliminary list:

Item Justification Parts List Cost
Brake Rebuild The current owner already has removed the front brakes for a rebuild, and as I found with the XS750 project, neglected brakes are a nightmare. Rebuild these now before they end up in as poor shape as the front brakes on the Yammie were when I bought it. K & L brake caliper rebuild kits, K & L master cylinder rebuild kits, new brake pistons (cheap, and solves a lot of problems), braided stainless steel brake lines. $425
Dime City Cycles "Euro" Handlebars As I recall, the stock GL1000 handlebars aren't that bad -- way better than those evil monstrosities, invented by the ghost of Torquemada himself, that Yamaha shipped on the XS750 -- but I'd like something a little sportier. This would be a much lower priority change, but I really want to replace the old brake lines before riding season, and I'm not going to buy braided stainless steel brake lines twice for this bike. That's just a waste of money. Dime City Cycles "Euro" Handlebars $50
New Headlight Bike had a Vetter fairing; needs new lights and mounting hardware. E-Bay "Dominator" headlights and cafe racer fork ears. $140
Replace Timing Belts Cheap insurance. Bike has an interference engine. If a timing belt breaks, you will be tearing down the engine to replace pistons and valves. That's why the engine on my first GL1000 project was in several Rubbermaid boxes when I acquired it. Gates timing belts. $30
Uni Foam Air Filter Easy, inexpensive maintenance/performance upgrade item. Uni foam air filter $25
Ignition System Refurb Spark plugs are a no brainer. Coils and wires are relatively inexpensive and simple to replace, also. Finally, points and condensers wear out, giving a weak spark. Replacing these parts should make for a better running engine. DR8EIX spark plugs, coils t.b.d., 7mm silicone spark plug wires and NGK spark plug boots from Mike's XS, and a Sudco tune-up kit. $200
Suspension Upgrades Suspension is one of my key concerns. Vintage bikes are notoriously undersprung, and I've been happy with these springs and shocks on my XS750.
Note: I'd prefer Race Tech springs and valve emulators in the forks, but at 1/3 the cost, these win the cost/value argument.
Progressive Suspension fork springs and Hagon 2810 TTSA shocks. $414
Total: $1284


There are other things I'd like to change too, but this should be enough to get the bike to the point where it is reasonably reliable, comfortable, good looking, and capable of running with the best of them while two-up. I won't be schooling competent sportbike riders in the twisties on a vintage Goldwing, nor will I be the flashiest bike in the state, but this should be a vast improvement over the status quo. And, I'll get to regain some of that karma I lost when I sold my first GL1000 project, lol.

I'll go take a look at the GL1000 tomorrow, and who knows? Maybe by tomorrow night, I'll be the proud owner of yet another GL1000 project bike ;)

Edit: I bought the 'Wing:


There are a few maintenance items that need to be completed before it's ready to ride, but in all honesty, it's a very clean bike for its vintage. After looking it over, I've changed the planned maintenance slightly. There are a few things that have already been taken care of, and a few things that I probably won't change until after the bike is running (function first, cosmetics later -- a lesson I learned from the XS750 project). Here is a Google Sheets document outlining the plan in more detail. I'll leave the table above as a snapshot of the original plan, but the Google doc will be changing as work progresses.

Monday, July 6, 2015

Too Much Wrenching, Not Enough Riding!

I can't believe it's already July.

Summer came early to Alaska this year. Usually, it's the first week of May before enough ice has melted off my driveway for me to be able to get the bikes out; this year, I was commuting to and from work by mid-April. The weather since then has been phenomenal too, with June being a long series of clear, blue, sunny days with temperatures as high as I've seen them since I moved to Alaska some twenty-odd years ago.

So, of course, I spent most of the month of June laid up with an injury that kept me off the bikes entirely during the best two weeks of the month, and then spent the remainder of the month just commuting back and forth to work. I'm almost recovered now, but as a result, I have only taken the Strom out of town once this summer, for the B.A.C.A. 100 Mile Ride. Sigh...

However, even if I haven't been riding as much as I'd like, I've been making progress on the Cafe Racer project. After blowing the head gasket on the Yamaha triple last summer, I picked up a new engine gasket kit from Athena and rebuilt the top end of the XS750. While I had the engine apart, I borrowed an ultrasonic cleaner from a co-worker, disassembled the carburetors, and cleaned the carbs (again...) to try to solve the high idle problem I've been fighting since I bought the bike. After ultrasonically cleaning the carbs, I noticed a ridge of gum inside the carb where the butterflies close, so I did some heavy-duty cleaning on the inside of the carb and the outside edge of the butterflies with some 1500-grit sandpaper, but still can't get the bike to idle properly (grrrr...). I also tested moving the needle valve clip to the stock position (the center position of the five possible settings), but the bike feels like it lost off-idle response and stumbles upon initial throttle input now, so I'll be moving the needle valve clip back to one setting above stock (one setting more lean).

One minor problem I noted with the Cafe Racer last summer was that the front forks felt rather soft -- not surprising, since I have no idea if the fork oil had *ever* been changed. Consequently, I purchased a set of Progressive 11-1107 fork springs from Amazon.com, and rebuilt the forks this past weekend, which turned out to be a much simpler task than I expected, once I figured out a couple of tricks to getting the forks disassembled:

  1. Don't Remove the Forks Completely:
    To remove the fork guts, you'll need to remove a spring clip in the top of the fork. The service manual says to hold the fork tube in a padded vise, then depress the cartridge inside the fork to pop the spring clip loose. I didn't have a padded vise, but was able to make do by lowering the fork in the triple clamps until only about an inch of the fork stuck up above the lower clamp, then tightening the bolts on the lower clamp. Then I used this tool here...:

    ...to depress the cartridge inside the fork...

    ...so I could pop the spring clip loose with a small screwdriver like so:

    NOW go ahead and remove the forks completely for the rest of the work!
  2. Pry Out the Oil Seals from Underneath:
    The next problem I ran into was getting the oil seals out of the fork bottoms. I spent a while trying to dig the oil seals out from the top before finally using the biggest flatblade screwdriver I owned as a pry bar to pop the oil seals out from underneath. Set the blade of the screwdriver under the oil seal, then place the shaft of the screwdriver on the top of the fork. Press down on the handle until the oil seal rotates 90 degrees in the fork, then pull it out with your finger. Easy ;)
  3. Make Sure You Have New Dust Seals:
    I didn't pick up new dust seals before starting on the forks. The dust seal on the right-hand fork looked to be in decent shape, so it probably would be fine, but since the left-hand dust seal is cracked and in pretty rough shape, I'll probably just replace both...once I get a new set of seals...which means I'll have to remove the forks from the triple clamps again in a few days or weeks :roll_eyes:
  4. Don't Forget the Washer Between the Springs and the Pre-Load Spacers:
    Yep, I forgot to install my spacer, so I had to partially disassemble the forks again. Fortunately, this gave me the opportunity to snap the photos above, since I didn't take any pictures at all the first time ;)
  5. Use a Torque Wrench to Tighten the Triple Clamps:
    Otherwise, you end up with a problem like this:

    Yep, I over-tightened one of the bolts and sheared it in half. Fortunately, it was easy to drill out from behind, so tomorrow, I'll pick up four new bolts (might as well just replace them all) and finish up the fork work.

Really, those were the only significant "gotcha's." Everything else was pretty straight-forward. Progressive included a piece of plastic tubing to use to set your spring pre-load with their kit, which means you have to cut the tubing to size for your application. They give measurements for a number of bikes, but unfortunately, the XS750-2D wasn't one of them. However, the XS850 was, and the size recommended for the 850 (1 1/2 inch) was almost exactly the same as the difference in length between the OEM springs and Progressive springs, so I used that. I haven't had a chance to test ride the bike since installing the springs because I can't kick start the bike right now (the aforementioned injury that had me laid up for most of June), and I've removed the electric starter, so kick-starting is the only option for firing up the Yammie. However, once I get a chance to test ride the bike, I'll edit this post with an initial impression on whether or not 1 1/2 inches of pre-load was a good call.

I also might have to revisit the amount of oil I added to the front forks, since I was a bit confused by Progressive's instructions on the subject. After reading and re-reading the instructions, then trying to figure out how to use the Motion Pro fork oil measuring tool, I think I added the right amount of fork oil, but I'm not certain. Again, once I get a chance to test ride the bike, I'll adjust the oil level as required to get the compression and rebound damping reasonable.

Monday, June 29, 2015

Loud Pipes?

I've never been a "loud pipes save lives" guy. I believe paying attention and playing the "what-if" game ("what's the stupidest @#$&!!! thing another motorist around me can do, and what will I do when -- not if -- they do it?") are the best ways for a motorcyclist to keep him/her -self safe. I've also always held the opinion that being courteous when sharing the road was a good idea. I've often cringed when another motorcyclist with straight pipes rode by, worrying that non-motorcyclists would lump us all in the same group. To me, the "loud pipes save lives" crew has always seemed like they were trying to rationalize their unbaffled exhausts with a thin veneer of justification. However, I'm starting to think that I was wrong. Loud pipes might not be such a bad idea, after all.

So I'm on my way to work on my V-Strom the other day, cruising down a 45MPH, secondary road (two northbound lanes, two southbound lanes, and a suicide lane down the middle). I'm in the right-hand northbound lane when a dually work truck pulls out ahead of me. No problem; he's far enough ahead that I can slow down or change lanes to avoid him. There's a four door Jeep Wrangler in the left-hand lane, but I've got room to change lanes, so I do. About the time that I turn off my turn signal and get stabilized after changing lanes, some complete tool in the suicide lane pulls into my lane so effing close that there's no time for me to brake, and the work truck is still just slightly ahead of me in the right-hand lane, and not yet up to the speed of traffic. I do a quick assessment of my options (not many), and think to myself, "I'm not gonna avoid this one. This is gonna hurt."

Fortunately, my guardian angel (who has got to be mainlining Valium at this point in my life, and who is well past due for a promotion, lol) points out the one escape route I have available. Maybe. It's marginal, but the only other option I have is to go over the hood of the Escape or CR-V or whatever little SUV it was that pulled in front of me (identifying make and model was honestly not at the top of my priority list at this point), so I grab a fist-full of throttle, and go for it.

As it turns out, there was *just* enough room for me to lane split between the SUV and the work truck, even on my wide-butt Suzuki, and I managed to successfully slip between them before I rocketed down the road ahead of them, wanting to get as far as possible from the distracted driver in the SUV as fast as possible.

As readers of this blog will know, I've been trying to figure out how to repair the broken, obnoxiously loud exhaust on my Yammie for a while, but ya know...after this incident, I don't think I will, after all. I'll probably do enough work to clean up the cosmetics on the XS' exhaust, but no one has *EVER* been unaware of me on the (103+ dB) Triple, whereas on my (83dB) V-Strom, I've had more than enough close calls. In fact, I think I'm even going to retrofit my Strom to a louder can, as well.

I originally posted a slightly shorter version of this rant on one of the forums I frequent, and several people chimed in with various observations about the pros and cons of this plan, including some interesting things I hadn't thought of, like an anecdote about revving the engine on a louder bike to make sure that an obviously distracted driver knows you are there. Since, in our society, honking the horn is often used to express displeasure with other motorists rather than to politely get someone else's attention, revving an engine once or twice on a sufficiently loud motorcycle can draw others' attention to you without the baggage associated with honking your horn.

Others, of course, took issue with my decision to make sure my bikes were loud enough to draw attention to them, mostly due to the fact that being loud can be offensive to others. I get it. That's why I've ridden my Strom for six years already with the stock exhaust. That's why repairing the broken exhaust on my Yammie was such a priority for me. But here's the rub: I can't count the number of times I've had to take evasive action to avoid another motorist who obviously didn't see me. Some of them were merely annoying; I had options and was able to avoid the conflict by adjusting speed and/or position without much drama. Others were a little more memorable, like the teenager in the bright orange H2 Hummer who looked me in the eye, then pulled out Right...Freaking...In front of me (and then tailgated me after I swerved past him in the oncoming lane of traffic!!!) or the twenty-something punk that had a near-death-experience (although he didn't know it) after he cut me off with so little room to spare that I locked up my rear brake TWICE to avoid crashing into the rear quarter panel of his car. This year, however, I've had two instances where I really didn't think I was going to be able to avoid the accident. Fortunately, I was wrong both times, but these two incidents have shaken me up enough that I'm seriously re-thinking my stand on loud exhaust systems on motorcycles. As a good friend of mine recently said in a Facebook post, "An aftermarket exhaust is cheaper than your deductible." Hmmmm...that's actually a really good point!

If cagers are so self-absorbed and self-centered that they can't put down the cell phone for the twenty minutes it takes to get to work, can't be bothered to put on a turn signal before changing lanes, and can't be bothered to perform a head-check or even look in their rear-view mirrors before pulling into traffic, then I no longer care if my exhaust disturbs their Zen moment with Enya on their 1200 Watts of Dolby Surround Sound during their morning commute. My right to have a reasonable chance of arriving alive at my destination is just a little more important than your right to peace and solitude inside your insulated cocoon. Sorry.

So here's the deal: I'm going to try to find a louder-than-stock exhaust for my Strom that (hopefully) will drop the weight a bit (OEM exhausts are notoriously heavy), that (hopefully) will improve performance and/or gas mileage a bit, and that (hopefully) will garner a little more attention from other motorists when I ride. I'm shooting for something that won't be obnoxiously loud, but I definitely am looking for something louder than stock. From the evidence I've seen, motorcycles are all but invisible to other drivers; I'm tired of being silent (or close enough, anyway) as well.

[end rant]

Saturday, May 2, 2015

Wish List

I recently attended the 2015 Anchorage Bike Show, where I got the chance to drool over a number of gorgeous bikes. The variety of bikes at the show was amazing, from the latest cruisers, adventure bikes, sport bikes and dirt bikes offered by all of the local dealerships to a number of simply stunning vintage restorations, including a nicely-done '79 GL1000 that looked so similar to my old 'Wing that I had to do a double-take to see if it really was my old bike (it wasn't -- mine was a year older). While kicking around at the bike show, I found myself wondering -- again -- what I'd have parked in my garage if time, space and money were no longer an issue. In no particular order, here's my (current) "dream-bike" list. Enjoy!

  • Honda GL1000: No surprise here. This is the bike that started it all for me, and I still kick myself for selling the 'Wing instead of finishing it. In truth, it's probably a good thing that bike wasn't ridable when I started riding, but I'd love to have one now.
  • Honda Interceptor/VFR: When I was high school, I had a paper route, and there was a particularly nice example of this bike that I'd always check out when I was out delivering papers. I've always loved the look of this bike, and by all accounts, it was an excellent performer in its day, too.
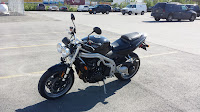
  • Triumph Street Triple R: I almost bought one of these, a 2009 model the same color as my V-Strom, after my CB550's engine started making metal. Not especially flashy, it's still got the goods to spank most modern "race replicas." (I'm pretty sure the bike in the photo is a Speed Triple rather than a Street Triple, but they look very much alike, even though the Speed has a larger engine).
  • Yamaha Bolt: Yeah, I know, I know. "A cruiser?!?!" And a smallish, Japanese one at that! Yamaha took a risk when they released this bike, and gave several bikes to a number of custom builders to see what they could do with the bike. That's seriously cool...as were some of the resulting customs. Even stock, I like the look, and being a part of Bikers Against Child Abuse, I'd like to build a cool bobber for rides with the group, since I feel slightly ridiculous in chaps and a vest on my V-Strom. Something like the Bolt would suit that role a lot better.
  • Suzuki SV650: What can I say? I've enjoyed my V-Strom, and would really like to see what the original, asphalt-only version of my bike could do. The number of parts that are interchangeable between the two models is just icing on the cake!
  • Norton Commando (Re-Issue): If money were no object... It's a modern sport-bike with the trappings of a vintage cafe racer, i.e., "Heaven on Earth."
  • Ducati Sport Classic: Yeah, I like modern retro cafe racers. Sue me ;)
  • Honda CB1000: Another retro-modern bike. <shrug> I like the way old bikes look.
  • Honda CB750SC: I fell in love with a CB550SC back when I was in college, and my first running bike was a much-less-well-maintained version of the same bike. I'd love to have the bigger version of that bike, now.
  • Suzuki Bandit 1250: Another bike I seriously considered when I bought my V-Strom, but too little experience coupled with a fairly heavy, 1250cc bike just didn't seem like a good idea. Now that I've got a couple more miles under my belt, I'd like a sport-tourer with a low enough purchase price that I can afford to tweak it to meet my needs.
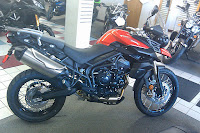
  • Triumph Tiger 800XC: If this bike had been available when I was searching for a replacement for my Nighthawk, I'd be sporting a bunch of Triumph gear now.
  • KTM or Yamaha Dirt Bike: So far, everything on my list has been street-oriented, but I'd like to have something a little more adventurous for exploring the many trails where I live.
  • Trials Bike of Some Kind: I really enjoy technical riding, and it doesn't get much more technical than trials.


So there it is: my dream garage, and a bike for every occasion. Given my foray into owning more than one bike, I'd say that with that many bikes, I'd probably spend more time wrenching than riding. It's probably good that I've only got three motorcycles sharing the stable right now ;)