Tuesday, December 22, 2015

Miscellany

Mid-winter a few years ago, a co-worker asked, "What do you do for fun, once the riding season is over?" Having just acquired the XS750 project, I replied, "There are two seasons in Alaska: riding and wrenching." I don't like to waste my riding season working on the bikes, since the riding season is short enough as is, and invariably, once I start working on a bike, I'll end up with it off-line while I'm waiting for parts to arrive. On the other hand, I do enjoy tinkering on the bikes, so taking them apart to perform all the maintenance and upgrades during the off-season -- when I can't ride, anyway -- is a good way to spend the cold, dark winter months. To that end, I have thrown myself into work on all three of my bikes over the last two months.


In August, I rode my ultra-reliable V-Strom to work one morning, and noticed that it was acting funny while I was idling at a stop light. The turn signals were kind of flickering rather than blinking, and the engine seemed to be running rough, which is very unusual for that bike. I revved the engine a bit, and it settled down, leading me to think that I had a dead battery. That wasn't particularly surprising, considering that it's still the original battery -- six seasons old, now. After work, sure enough, there wasn't enough juice to start the engine. Fortunately, a co-worker was able to jump start me, and I made it home...but just barely. I needed the bike running ASAP, since our motorcycle organization had an event that weekend (this was a Thursday), so rather than taking the time to perform full diagnostics, I jumped to the most likely cause -- a dead battery -- and bought a replacement the next day. After work, I plugged in the new battery, started the engine, and connected a multi-meter to the battery terminals, reading 12.3VDC...not good. I should have been reading just over 14VDC. I took the Yamaha on the BACA event, then ended up ordering both a replacement voltage regulator and stator...at which point, I found that I also needed a gasket for the stator cover, since the V-Strom drips oil onto the stator to keep it cool. I believe I already mentioned something about invariably waiting for parts, once starting a maintenance project?

...all the while, I'm riding the 5000-RPM-idle cafe racer to BACA events...

...an hour away from home, one-way...

...in the rain.


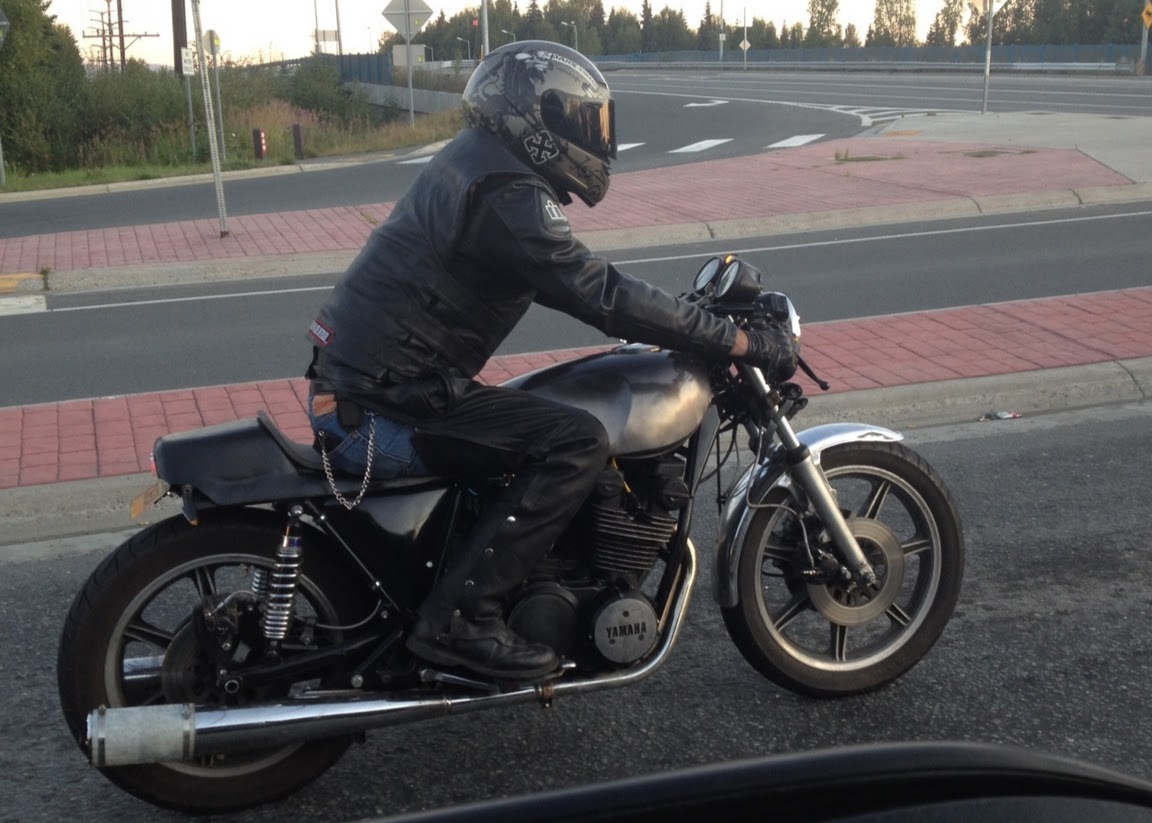
The cafe racer is a fun bike, but with clubman handlebars and NO fairing to protect from the weather, while wearing leathers only in the rain (no rain suit, because my orange nylon rain suit does not exactly scream, "I am a bad-*** biker, and can keep you safe from those who mean you harm") at maybe 40F...not so much.

I was really missing my fairing, my heated grips, and my heated jacket liner, lol (fine, I'm a wuss; what's your point?!?!)

Then, on yet another cold, rainy day on the cafe racer, I started having problems getting the bike into first gear. I could shift into neutral, second, third, etc., but I had a bear of a time getting the bike to downshift into first at intersections. In frustration, I parked the bike, and caged it with my wife to escort one of our BACA kids to court, then when I got the chance to check the Yamaha Triples web site, I discovered that the XS750's have a tendency to break the layshaft bolt, which then causes difficulty shifting into first gear.

Great...with maybe three weeks left in the riding season and BACA Anchorage getting busy working with kids, I had not just one, but *TWO* broken bikes. The whole point of having a second bike was to have an alternate in case a bike broke down!

With the Yamaha now out of service, I jumped into high-gear trying to get the electrical problems with the V-Strom sorted out, since fixing the charging system seemed like a more manageable task. Yeah...no. After finally getting it all put back together again, I took the Strom out for a 10:00 p.m. shake down ride. I was elated for the first eight miles, as the cheapie Amazon.com volt meter that I had plugged into the accessory electrical socket was showing a steady 14.4VDC while riding. Then all of a sudden, I noticed that my voltage was dropping: 13.7V...13.6V...13.5V...about a tenth of a volt per second, more or less. I quickly whipped a U-turn and raced back home...12.9V...12.8V...7.0V. Wait, what?!?! 14.0V...12.2V...13.1V...I started seeing wild voltage swings all over the place, and my LCD panel on the bike had gone completely blank. The engine was running rough again -- the ECU wasn't getting good voltage, so the fuel injection was getting squirrely -- and I just barely made it home (the bike died in the driveway). I opened up the bike -- AGAIN -- and determined that the brand new regulator/rectifier had failed. I parked the Strom, because quite frankly, I was completely fed up with it. I had sunk $450 in parts on the V-Strom in the last two months, and it STILL didn't work right. I spent the rest of the season riding my wife's CB750A to BACA events, and caging it to and from work, sigh.

Fortunately, this was the point that I found the GL1000 project, and I had so much fun working on this bike, that I eventually built up enough motivation to dig into the V-Strom again. Electro-Sport made good on their warranty of the regulator/rectifier, which I re-installed last night, and which now seems to be working properly.


Then, I managed to obtain spousal approval on a pair of Dime City Cycles mufflers for the Yamaha, which are now sitting in the garage, waiting for me to fabricate new balance tubes and connecting pipes to the existing headers. After that, I'll need to drain the oil and dig into the transmission case to replace the layshaft bolt. Oh, yeah...and I've got an envelope full of carburetor parts -- butterfly shaft screws, butterfly shaft seals, circlips, and springs -- for the XS750. Hopefully, those will resolve the high-idle problem on the cafe racer; if not...new carbs?

As for the GL1000...it needs a new voltage regulator, too. Unlike the V-Strom, the 'Wing uses a separate voltage regulator and rectifier, but most of the after-market units I have found seem to be integrated. Oregon Motorcycle Parts makes a reasonably priced unit that seems like it would fit the bill quite nicely, and in my initial conversations with them, they seem to be pretty good people to work with. I expect to have their VRRPM3H-GL1000 model on order in the fairly near future. After that, lower handlebars (so I can connect the front brake line), and a new battery...and the GL1000 should be running! I still want to replace the rear shocks with Hagon 2810 TTSA's, like I did on the Yamaha, and I'd like to order new side covers and shelter covers from E-Bay, because I'd like to go satin black on the 'Wing, but I don't want to ruin the original plastic, since it's in reasonably good shape. However, that's all wish-list material, not necessary-to-get-the-bike-running items ;)

Thursday, December 17, 2015

GL1000 Project, Part 4: Fork Springs


Given the intended mission of the "new" GL1000, one of the higher priority items on my to-do list is upgrade the suspension. This was also a high-priority on the XS750 project, so taking a cue from the work I did last spring on the Yammie, I bought a set of Progressive Suspension fork springs for the Goldwing. Although time consuming -- it took about 6 1/2 hours, most of which was spent trying to remove the old dust seals and oil seals -- the work was relatively straight-forward. Here's how I did it:

  1. Place a jack under the engine of the bike -- but don't lift it yet! -- then loosen up the axle pinch bolts at the bottom of the forks, remove the front fender, and remove the brake calipers.

  2. Just barely loosen the bolts that hold the forks in the triple tree.

  3. Raise the front wheel off the ground with the jack, then remove the front wheel.

  4. Now, loosen the bolts that hold one fork leg in the triple tree, and slide the fork almost -- but not completely -- out of the triple tree. Now tighten the bolt in the lower triple clamp to hold the fork in place while you...

  5. ...use an allen wrench to remove the cap on the top of the fork leg. Be careful, because the cap will be under tension from the fork spring! If you're not careful, the cap will fly off of the fork ;)

  6. Loosen up the bolt in the lower triple clamp, and remove the fork from the triple tree.

  7. At the bottom of the fork, near the bolt that holds the fender brace in place, is the oil drain bolt. Remove it, and drain the fork oil. Once the flow of oil has almost stopped, pump the forks a few times to remove the remainder of the oil.

  8. Remove the fork spring.

  9. Now, turn the fork upside down, and use an allen wrench to loosen the bolt that holds the damper rod inside the fork tube.

  10. Remove the damper, and let any remaining oil drip onto a rag or into the drain pan.


  11. Remove the dust seal -- easier said than done, in my case -- and then use a small, flat-blade screwdriver to remove the spring clip that holds the oil seal in place.

  12. Sacrifice a small goat and maybe a chicken, say the proper prayers to the appropriate kindly spirits, and if you are very, very, VERY lucky, you will be able to remove the dust seal and the (shown) oil seal. I actually had to use a heat gun to warm up the fork leg and soften the 37-year-old rubber, then use a lot of elbow grease -- and a fair amount of patience -- to remove the oil seal. Randakk's has a blog entry on building a tool to assist with the job; I just used a (large) screwdriver.

  13. Depending upon the age and condition of your forks, you might need to spend a little quality time cleaning up the insides of the fork. In my case, the forks were pretty nasty, so I used some denatured alcohol, then some brake cleaner to get all of the grunge and old fork oil out.

  14. Once everything is clean, install the new oil seal, retaining clip, and dust seal, then slip the damper back inside the fork tube, and slide the fork tube back inside the fork lower.

  15. Tighten the allen screw on the bottom of the fork to lock the damper in place.

  16. Collapse the fork, and fill the lower with fork oil. The Honda manual says to use a little over 6 oz. of ATF(!) transmission fluid in the fork (actually, I think it was a little over 7 oz., when completely rebuilding the forks, as I did). The Progressive Suspension guide says to use no more than 140mm (from the top of the collapsed fork) of whatever oil the manufacturer recommends. I was leery of using ATF (why use transmission fluid, when there are oils that are DESIGNED for suspension damping?!?!), and the research I did on-line suggested that modern ATF fluid is not necessarily the same as what was available in 1978, so I used 10W Honda fork oil. I set my fork oil measuring tool to 180mm from the top of the fork, since a larger setting means less oil, and filled the first fork. When doing the second fork, I found that I did not have quite enough oil to fill it to the same level, meaning I must have added a little over 8 oz. of fluid. Hrmmmmm... I debated resetting the measuring tool to a lower level, so that I had a little more oil for the second fork, but in the end, I just bought another bottle of 10W fork oil. I doubt I added more than a half oz. of fluid to the second fork! <shrug> I'll see how the suspension feels, once the bike is running. If the front suspension damping feels too harsh, I'll drain some fork oil and see if that helps.

  17. Slip the new fork spring into the fork.

  18. Replace the o-ring on the fork cap.

  19. Slide the fork into the LOWER triple clamp, and tighten the bolt to hold the fork securely. This allows you to use both hands to screw the fork cap in place, and also allows you to tighten the cap (most manuals suggest putting the fork tube in a padded vise, but...why?). Once the cap is tight, loosen the bolt in the lower triple clamp, and slide the fork all the way into the top triple clamp, then tighten the bolts in both the upper and lower triple clamp to hold the fork securely.

  20. Repeat these steps for the second fork, then reinstall the wheel and the fender and you're done!


I had several other tasks that couldn't be completed until I had replaced the fork springs, so once I was done, I reinstalled the brake calipers, removed the OEM headlight ears,
installed a set of Dime City Cycles fork ears,
installed the new headlight bucket and the new turn signals, then sorted out the rats' nest that is the headlight and turn signal wiring.

Once the electrics were sorted, I temporarily put my old V-Strom battery back in the bike, and tested the turn signals...which lit up, but wouldn't flash. A new, electronic flasher module is now en route from Superbright LEDs.

Also, before tackling the fork springs, I changed the radiator fluid and final drive oil, neither of which is sufficiently complicated to warrant a blog entry. However, while running the engine during the coolant change, I discovered that the volt meter was indicating 16.7V at 2000 RPM(!). Not knowing if this was actually a charging system problem or a faulty volt meter, I connected my multimeter to the battery terminals, and found that the volt meter was, in fact, indicating correctly. I quickly shut the engine off, since I didn't want to damage the already undersized V-Strom battery, and found the "charging system troubleshooting guide" in my Clymer manual. I was happy to find that both the stator and rectifier were working properly, but apparently, the voltage regulator was toast. I've pretty much decided to replace the rectifier and regulator with a combined unit from Oregon Motorcycle Parts, but I'll probably wait until after Christmas to order it. I'll also need a new battery, since the faulty charging system is most likely what killed the old one (it wouldn't take a charge from my Craftsman battery charger), so...$50 Wal-Mart battery or $300 Shorai? We'll see how finances look this spring, I guess ;)