Monday, February 7, 2011

Electrical System Upgrades

I know there are people who ride their motorcycles all winter long, but I'm not one of them.  Whether that's because I'm not skilled enough or because I'm not dumb enough to try, I'll leave as an exercise for the reader :) but whatever the cause, there is a large block of time between November 1 and April 1 that my V-Strom just sits in the garage.  However, don't believe that means the Wee is neglected during this time; far from it.  This winter, at least, I am taking advantage of the down time to do some upgrades on the bike.  I've already posted the SW-Motech crash bar installation.  I'll also be changing the air filter, oil and oil filter before hitting the roads again this spring.

There are some electrical modifications I would like to make to the bike this winter, as well.  First, while the stock V-Strom headlights are pretty much amazing (much better than my Nissan Frontier, even), I'd like to add a little extra lighting to make the bike more conspicuous at night, so I'm adding fog lights.  Second, it can get a little chilly in south-central Alaska, even in the summer time, so I would like to add heated grips.  Third, after adding the TechMount PDA holder to the bike, I realized it would be good to have an auxiliary power port near the handlebars to supply power for my Android phone.  Using the GPS and Google Navigator sucks the battery dry much like an early '70s muscle car sucks a gas tank dry.  If I want to navigate with the Android for more than about an hour (especially in Alaska, where there are long stretches of highway with poor cellular service), I need a way to get juice to it.

Before deciding on these items, however, I had to take stock of the electrical load this would place on the bike.  From what I could find on-line, the V-Strom's alternator can supply about 40 amps of current.  EDIT: Pat (Greywolf) over at Stromtroopers suggests it may be a little lower -- 33A rather than 40A, with 10-12A available for accessories.. My thumbnail calculations suggest that my intended upgrades would add about 16 amps 5 amps:

  1. Fog lights: ~10 amps (2 x 55 watts @12 volts = 110 watts @ 12v = 9.2 amps) ~130mA (I found some LED H3 bulb replacements over at superbrightleds.com that I will be using instead of the halogen lights that came with my fog lights to keep current draw down);
  2. I am also replacing the stock incandescent brake lights with LEDs from superbrightleds.com, giving me one additional Amp (Note: they also sell straight 1157 replacemnt LEDs, but I decided to go with the motorcycle bulb after reading a report that the straight 1157s only illuminate directly behind the bike rather than lighting up the whole reflector);
  3. Oxford's Heated Grips: 4 amps (48 watts @ 12 volts);
  4. GPS power: 2 amps (my Android phone supposedly draws about 0.5 amp, but I'm providing a really large fudge factor for other devices).
The headlights draw about 10 amps, as do the high-beams and fog lights.  I can't imagine that the rest of the electrical system (ECU, brake lights, etc.) on the bike pulls 14 amps, so as long as I don't try to run fog lights and high-beam lights at the same time, I should be okay (anyone have experience to the contrary?). EDIT: based on Greywolf's suggestions (see link above), I think I should have more than enough power to run the new gadgets without overtaxing the electrical system on the bike. In fact, if my math is correct, I should still have 5-7A of current available, even with everything turned on.

After lots of trial and error, I decided to mount the fog lights at the bottom of the SW-Motech crash bars.  There is a fillet at the front of the crash bars where the bars wrap upwards around the engine.  That places the fog lights lower than I would like, where they could potentially be damaged by obstacles on the ground, but I when I tried to mount them inside the cowl, they didn't clear the forks.

Yes, it needs a longer bolt.  I'll fix it...eventually.
 Another problem I ran into with the fog light installation is finding a way to turn them on and off.  At first, I intended to buy a rocker switch from one of the electronic parts stores in town, but then I realized I would need a waterproof switch since I ride rain or shine.  I could trigger the relay with the current going to the headlights so that the fog lights would be on whenever the bike was running, but I wanted to be able to turn them on and off as needed.  I could just tie them into my high-beams, but I rarely use my high-beams (I don't want to blind oncoming traffic; just make myself a little more conspicuous).  After a lot of searching, I found a better solution.  Aerostich.com sells a nifty electronic module that ties into the on/off switch for your high-beam lights.  Trigger the high-beams for one second, and the autoswitch toggles power to another circuit.  If I connect the output wire from the autoswitch to a relay, I can turn the fog lights on and off at will.  Voila!  Problem solved :)

The next problem was trying to decide how to distribute power to all of these electronic gadgets.  I don't want to simply run a lead to the battery for each of these circuits, since that is a sloppy approach.  I don't want to clutter the battery with a slew of ring terminals, nor do I want to add more wiring than necessary to the bike.  I discovered that Suzuki offers heated grips as an option for the V-Strom, and that there is a power lead near the radiator that is designed to power the OEM heated grips.  This power lead only has power while the bike is running, so I can't inadvertently leave the heated grips or fog lights on when the bike is off.  This wire has a plastic quick-disconnect connector to allow you to easily add the heated grips after purchasing the bike, and Easternbeaver.com makes a wiring harness that is designed to plug into this connector to provide power to your accessories.  Eastern Beaver recommends that you only use it for low power accessories ("less than 7 amps"), but that is plenty of power to trigger a relay for all of my accessories.  If I connect a wire from the battery to a relay, trigger the relay with the heated grip circuit, then run the relay to a bus bar, I can provide switched power for all of my accessories directly from the battery.  Here's the schematic for the circuit:

Although I don't much care for Microsoft, Visio is a pretty good product :)
I have ordered and received the autoswitch from Aerostich, and I have just placed my order for the Eastern Beaver wiring harness so I don't have any photos of the installation process...yet.  I'll be updating this post as I install the new electrical circuits, and review the products I install.

Saturday, February 5, 2011

August Arctic Valley Ride

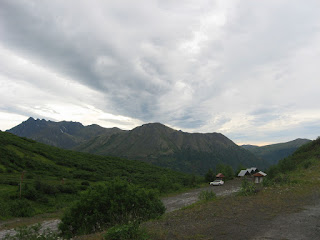
Just outside of Anchorage is a ski area called "Arctic Valley".  The road to Arctic Valley is a winding gravel road that technically is a part of Ft. Richardson, the Army post at Anchorage.  While Ft. Rich proper is a closed base, the road to Arctic Valley is open to the public.  In the summer, Arctic Valley is a popular spot for hiking and picking berries, like cranberries and blueberries.  It was also the first gravel road I took my V-Strom on.  Unfortunately, when I first tried to ride up Arctic Valley, there was still snow on the road a couple of miles from the top.  So, in August, I decided to ride the valley again :)

The day I rode back up to Arctic Valley, the skies were grey and weepy.  I couldn't decide if it was a light rain or a heavy mist, but whichever name you choose to assign to the precipitation, the result on the road was the same: it was very, very wet.  Up to this point, I had pretty much avoided muddy roads, but after 5,000 or so miles this season, my confidence was relatively high, so I pointed the V-Strom up the mountain, and gave a twist to the throttle.

All in all, I was quite happy with the V-Strom's handling on the wet gravel road.  While the stock Bridgestone TrailWing tires didn't feel quite as secure on the mud and gravel as they did on asphalt, the grip was surprisingly similar to what I had experienced on dry gravel: a little squirrely, but not too bad.  Just as on dry gravel and dirt, I stood up on the foot pegs and reduced speed a bit.  I had long ago discovered that decoupling my backside from the bike seems to have an immediate, dramatic and positive effect on bike stability when riding off pavement -- I think I tend to unconsciously overcompensate for every little wriggle of the bike on gravel, making the bike feel less stable than it really is.  When I stand up, those small oscillations are damped by my knees and ankles, and consequently, the bike "feels" more stable.  Whatever the cause, I can comfortably ride about 5MPH faster on gravel when I'm standing than when I'm sitting.

As for the ride itself...well, I love the mountains, and Arctic Valley is no exception.  At the bottom of the hill, just past the Ft. Rich golf course, I noticed a car in the oncoming lane had stopped, and the occupants were peering into the woods that lined the north-east side of the road.  I slowed down, trying to see what they were looking at, and was rewarded by the flash of a bear butt (not a "bare" butt, lol) as a small black bear, startled by the sound of my V-twin engine, disappeared into the woods.  I kicked myself for not having my Oregon Scientific camera, which is semi-permanently mounted on my handlebars, running at the time, but truthfully, I suspect the bear would have been out of the field of view, anyway.  I felt bad about scaring the bear (and ruining the encounter for the occupants of the car), but a stock Wee-Strom is pretty quiet, so I don't know what more I could have done.  I rode very carefully the rest of the trip, watching for bear and moose on the side of the road since both are quite common in this area, but there were no more to be seen.

A mile or so further up the road, I pulled over into a scenic overlook that overlooks Ft. Rich, Elmendorf AFB and Anchorage, and lowered the pressure in my tires a bit.  I typically run at 33-37 PSI on asphalt, but I've found that dropping pressure to about 25 PSI improves the feel of the bike on gravel.
As I lowered the tire pressure and snapped a few obligatory photos of the bike and of the view from the overlook, I was attacked by an angry swarm of hungry no-see-ums.  There are many things I love about Alaska, but the insect life is not one of them. Despite my best attempts to shoo the voracious little monsters away, several still found there way inside my motorcycle helmet, so I quickly jumped back on the bike and rocketed away in an attempt to flush the pests out with a 30 MPH breeze.  Unfortunately, that meant that I had to keep my faceshield open, and did I mention that it was raining?  I had a choice: tiny flying bugs buzzing about my face and ears, or stinging 30MPH rain drops in my eyes.  I chose the rain :)


Another couple of miles later, I reached the parking lot at the end of the road, and stopped to snap a few more pictures before riding back down the mountain.  As I had noticed on my early season trip up the mountain, riding down was a bit more intimidating than riding up the gravel road.


First of all, when riding uphill, if you find you are going a little fast, all you need to do is roll off the throttle a bit, and gravity will take care of the rest.  While the DL650 has remarkably good compression braking (allowing the rider to use the same technique when riding downhill), the effects of rolling off the throttle while riding downhill are subtly -- but critically -- different than when riding uphill.  If you determine that you need to slow down when riding uphill, rolling off the  throttle increases the friction available for cornering because you are no longer using a portion of your friction to propel you up the mountain.  When riding downhill, reducing the throttle (and therefore using engine compression to brake) decreases the amount of friction available for cornering because some of the friction is now being used to slow the bike against the pull of gravity.

At any rate, the V-Strom was sure-footed as ever, lending confidence to what suddenly appeared to be a much steeper downhill grade than the uphill grade I had just ridden a few minutes ago -- even though they were the exact same road :)  Approximately fifteen minutes later, I was west-bound on the Glen Highway, returning home after a fun hour or so playing in the Chugach Mountains.

Wednesday, February 2, 2011

V-Strom 650 Air Filter Change

It's winter in Alaska, and that means my bike is sitting idle for another two months, or so.  I have decided to take advantage of the down time to perform some needed maintenance: installing SW-Motech crash bars, adding an auxiliary power bus to the electrical system, changing the oil and oil filter, and changing the air filter.

I bought the bike 11 months ago, and have racked up 5800 miles since then, so it's definitely time to put a new filter in.  However, I have to admit, I didn't know how to get access to the air box :(  Notes I found on-line suggest that the air box is under the gas tank and that you need to remove both the fairing and the tank to perform the procedure.  Since I don't have a Suzuki Maintenance Manual ($$$), and there doesn't seem to be a Clymer manual for my bike yet, I turned to Google (the parts drawings on Bike Bandit are also a great resource).

That's how I found this blog post which describes the procedure, albeit on an '04 model.  I will try his instructions, and if I run across any differences between his '04 model and my '09, or if I find anything that needs more explanation, I'll post either supplementary notes or an entire procedure here.

Edit (04/17/2011): Well, it took me longer to get around to doing the air filter change than I intended, but I finally did it.  The deus ex machina write-up was very good, and the procedure was not at all difficult, once you get past the mental block of having to remove the gas tank and take apart half of the fairing.  That sounds like a real pain in the backside, but actually, it was a remarkably simple procedure.  If you've been putting off an air filter change in your Strom because it sounds like more work than you want to take on, take my advice: just go do it.  You'll be fine, I promise :) and your bike will be happy now that it can finally breathe easier.